Kärcher garden cleaners are renowned for their efficiency and reliability in keeping outdoor spaces pristine. However, like any piece of machinery, they can encounter issues over time.
In this guide, we’ll explore common problems garden cleaner users face and how to effectively resolve them. Whether it’s a lack of pressure, leaks, or nozzle blockages, we’ve got you covered with actionable solutions.
| Key Takeaways |
|---|
| 1. Understand your Kärcher garden cleaner: Know how it operates and its components to troubleshoot effectively. |
| 2. Regular maintenance is crucial: Keep your cleaner clean, inspect components, and lubricate moving parts as needed. |
| 3. Address issues promptly: Don’t ignore problems like lack of pressure or leaks; tackle them early to prevent further damage. |
| 4. Seek professional help when needed: For complex issues or motor failure, consult a qualified technician for repairs. |
| 5. Store your cleaner properly: Protect it from dust, moisture, and extreme temperatures to prolong its lifespan. |
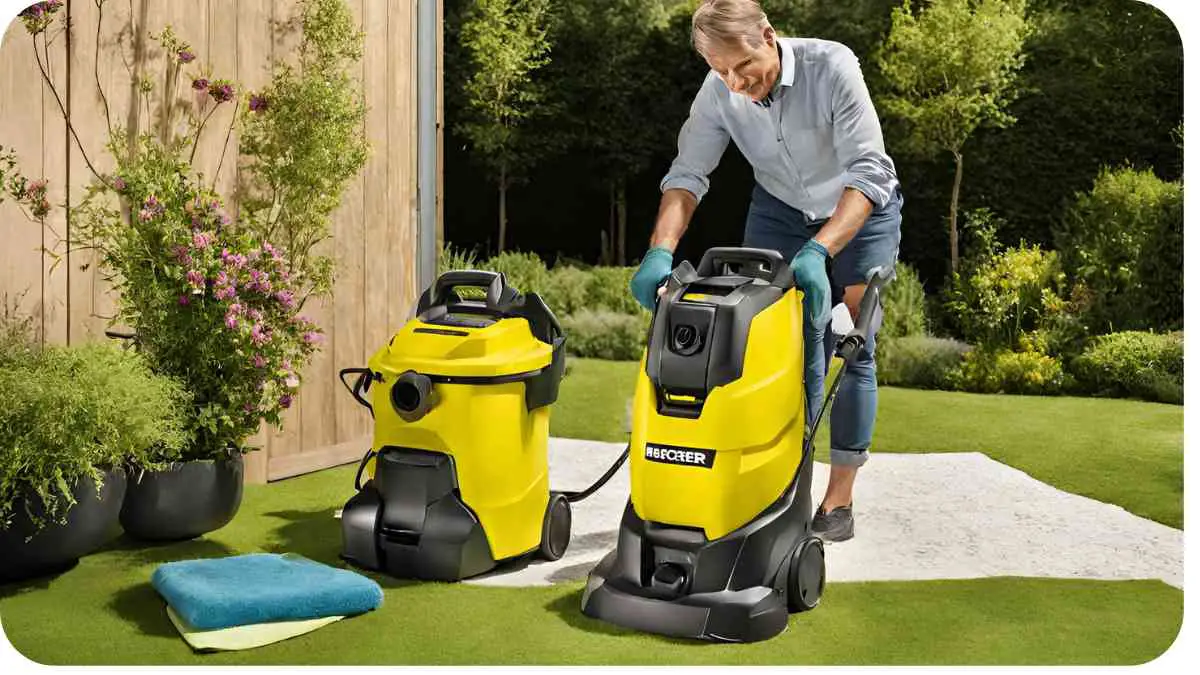
2. Understanding the Kärcher Garden Cleaner
Before diving into troubleshooting, it’s crucial to understand the basics of your Kärcher garden cleaner. These machines utilize high-pressure water jets to blast away dirt, grime, and debris from various surfaces such as patios, driveways, and garden furniture. With powerful motors and robust construction, they are designed for durability and performance.
Balancing water levels is crucial for both traditional gardens and hydroponic systems. While overwatering can drown plants in soil, hydroponic setups offer controlled environments. Understand the nuances to optimize plant health.” Why is Too Much Water Harmful to Plants in a Garden but Not in a Hydroponic System?
3. Common Issues with Kärcher Garden Cleaner
Lack of Pressure
One of the most frustrating issues users encounter is a lack of pressure from their Kärcher garden cleaner. This can significantly impact cleaning effectiveness and efficiency.
| Problem | Potential Causes | Solutions |
|---|---|---|
| Lack of Pressure | 1. Water inlet filter clogged <br> 2. Damaged or worn nozzle <br> 3. Air leaks in the system | 1. Clean or replace water inlet filter <br> 2. Replace damaged nozzle <br> 3. Check and tighten connections to eliminate air leaks |
Leaks and Drips
Leaking or dripping water from the garden cleaner can lead to water wastage and reduced performance.
| Problem | Potential Causes | Solutions |
|---|---|---|
| Leaks and Drips | 1. Loose fittings <br> 2. Damaged seals <br> 3. Cracked hoses | 1. Tighten loose fittings <br> 2. Replace damaged seals <br> 3. Patch or replace cracked hoses |
Nozzle Blockage
Blockages in the nozzle can disrupt the water flow, resulting in uneven cleaning or complete loss of pressure.
| Problem | Potential Causes | Solutions |
|---|---|---|
| Nozzle Blockage | 1. Debris accumulation <br> 2. Mineral deposits <br> 3. Kinks in the hose | 1. Clear debris from the nozzle <br> 2. Soak the nozzle in vinegar to dissolve mineral deposits <br> 3. Straighten out kinks in the hose |
Motor Failure
Motor failure is a less common but more serious issue that may require professional assistance.
| Problem | Potential Causes | Solutions |
|---|---|---|
| Motor Failure | 1. Overheating <br> 2. Electrical faults <br> 3. Mechanical wear | 1. Allow the motor to cool down before restarting <br> 2. Check electrical connections and wiring <br> 3. Consult a professional technician for repairs |
4. Troubleshooting Guide
In this section, we’ll delve deeper into each common issue and provide detailed troubleshooting steps to help you get your Kärcher garden cleaner back in top shape.
Frequent jamming in your Fiskars pruner can hinder garden tasks. This troubleshooting guide provides insights into common issues and effective solutions to keep your pruning sessions smooth and efficient.” Troubleshooting Guide: Fiskars Pruner Jamming Frequently
Lack of Pressure: Causes and Solutions
When your garden cleaner lacks pressure, it can be frustrating, but the solution might be simpler than you think.
Water Inlet Filter Clogged: The water inlet filter can get clogged with debris over time, restricting the flow of water into the machine. To resolve this, simply remove the filter and clean it thoroughly. If it’s heavily clogged, consider replacing it with a new one.
Damaged or Worn Nozzle: A damaged or worn-out nozzle can also cause a drop in pressure. Inspect the nozzle for any signs of damage or wear, such as cracks or deformities. If you notice any, replace the nozzle with a new one to restore optimal pressure.
Air Leaks in the System: Air leaks in the system can also lead to a loss of pressure. Check all connections, hoses, and fittings for any signs of leaks. Tighten any loose connections and replace any damaged hoses or fittings to eliminate air leaks and restore pressure.
Leaks and Drips: Identifying and Fixing
Leaking or dripping water from your garden cleaner can waste water and reduce its effectiveness. Here’s how to identify and fix common causes of leaks and drips.
Loose Fittings: Start by checking all fittings and connections for tightness. Use a wrench or pliers to tighten any loose fittings, such as hose connections or nozzle attachments.
Damaged Seals: Inspect the seals around hose connections, fittings, and the pump for any signs of damage or wear. If you notice any cracks or deterioration, replace the seals with new ones to prevent leaks.
Cracked Hoses: Examine the hoses for any cracks or splits that could be causing leaks. If you find any damage, patch the affected area with waterproof tape or replace the hose entirely for a more permanent solution.
Nozzle Blockage: Clearing the Path
A blocked nozzle can disrupt the flow of water from your garden cleaner, leading to uneven cleaning or loss of pressure. Here’s how to clear nozzle blockages effectively.
Debris Accumulation: Start by inspecting the nozzle for any visible debris or blockages. Use a small brush or toothpick to dislodge any debris trapped inside the nozzle.
Mineral Deposits: If the nozzle is clogged with mineral deposits, soaking it in vinegar can help dissolve the deposits and restore proper flow. Simply submerge the nozzle in vinegar for a few hours, then rinse it thoroughly with water before reattaching it to the garden cleaner.
Kinks in the Hose: Check the hose for any kinks or bends that could be restricting the flow of water. Straighten out any kinks or bends in the hose to ensure uninterrupted water flow.
Bosch garden battery lifespan directly impacts tool performance and longevity. By understanding battery maintenance and usage, you can optimize its lifespan, ensuring consistent power for your gardening tasks over time.” Understanding the Lifespan of Your Bosch Garden Battery
Motor Failure: Diagnosing and Repairing
Motor failure is a less common but more serious issue that may require professional attention. Here’s how to diagnose and address motor-related problems with your garden cleaner.
Overheating: If the motor overheats, it may shut down to prevent damage. Allow the motor to cool down completely before attempting to restart the garden cleaner. Avoid overworking the motor by taking breaks during extended cleaning sessions.
Electrical Faults: Check the electrical connections and wiring for any signs of damage or wear. Loose or damaged wires can cause electrical faults that prevent the motor from functioning properly. If you suspect an electrical issue, consult a professional technician for repairs.
Mechanical Wear:
Over time, the motor may experience mechanical wear that affects its performance. If you notice unusual noises, vibrations, or decreased power output due to mechanical issues, it’s essential to address them promptly. Consult the user manual for maintenance tips and recommended servicing intervals. If the motor shows signs of significant wear, such as worn bearings or damaged components, it may need to be replaced or repaired by a qualified technician.
5. Maintenance Tips for Longevity
Preventive maintenance is key to ensuring the longevity and optimal performance of your Kärcher garden cleaner. Here are some essential maintenance tips to keep your machine running smoothly:
Regular Cleaning
Regularly clean the exterior of the garden cleaner to remove dirt, dust, and debris that can accumulate during use. Use a damp cloth or sponge to wipe down the surfaces, taking care to avoid getting water inside the machine’s electrical components.
Efficient setup of your Nxeco controller enhances garden automation capabilities. Follow these steps to ensure seamless integration and optimal performance, maximizing the benefits of smart technology for your gardening endeavors.” How to Properly Set Up Your Nxeco Controller
Proper Storage
Store the garden cleaner in a clean, dry area away from direct sunlight and extreme temperatures. Use a cover or tarp to protect it from dust, moisture, and debris when not in use. Avoid storing the machine outdoors during the winter months, as exposure to freezing temperatures can damage internal components.
Component Inspection
Periodically inspect the hoses, fittings, nozzles, and seals for signs of wear, damage, or deterioration. Replace any worn or damaged components promptly to prevent leaks, loss of pressure, or other performance issues. Regularly check the water inlet filter for clogs and clean or replace it as needed.
Lubrication
Lubricate moving parts, such as pump pistons and motor bearings, according to the manufacturer’s recommendations. Use a high-quality lubricant suitable for the specific components of your garden cleaner to ensure smooth operation and reduce friction and wear.
Solar power offers sustainability for garden sensors, but is it adequate? This comprehensive guide explores the feasibility of solar energy for powering your garden sensors, providing insights into optimizing efficiency and reliability.” Is Solar Power Enough for Your Garden Sensors? A Comprehensive Guide
6. Conclusion
In conclusion, resolving common issues with your Kärcher garden cleaner is achievable with the right knowledge and troubleshooting techniques. By understanding the machine’s components and how they work together, you can effectively diagnose and address problems such as lack of pressure, leaks, nozzle blockages, and motor failure.
Regular maintenance and proper care are essential for keeping your garden cleaner in top condition and extending its lifespan. By following the maintenance tips outlined in this guide and addressing issues promptly, you can ensure that your Kärcher garden cleaner continues to deliver reliable performance for years to come.
If you encounter more serious or complex issues that cannot be resolved with basic troubleshooting, don’t hesitate to seek assistance from a qualified technician or contact Kärcher customer support for further guidance. With proactive maintenance and timely repairs, you can keep your outdoor spaces looking clean and pristine with ease.
Further Reading
For additional resources and troubleshooting guides, check out the following links:
- Kärcher Outlet Troubleshooting Guide: Explore this comprehensive troubleshooting guide from Kärcher Outlet for tips and solutions to common issues with Kärcher garden cleaners.
- Kärcher Home & Garden Product Troubleshooting – Floor Cleaners: This page provides troubleshooting tips specifically tailored to Kärcher floor cleaners, helping you address any problems you may encounter during use.
- Kärcher Home & Garden Product Troubleshooting – Electric Pressure Washer: Get expert advice on troubleshooting electric pressure washers with this resource from Kärcher. Find solutions to common issues to keep your equipment running smoothly.
FAQs
How do I troubleshoot a Kärcher garden cleaner that lacks pressure?
To troubleshoot a Kärcher garden cleaner with low pressure, check for clogged water inlet filters, damaged nozzles, or air leaks in the system. Clean or replace the filter, inspect the nozzle for damage, and ensure all connections are tight to resolve the issue.
What should I do if my Kärcher garden cleaner is leaking water?
If your Kärcher garden cleaner is leaking water, start by checking for loose fittings and damaged seals. Tighten any loose connections and replace any damaged seals to stop the leaks. Additionally, inspect the hoses for cracks or splits and patch or replace them as needed.
How can I clear a blockage in the nozzle of my Kärcher garden cleaner?
To clear a blockage in the nozzle of your Kärcher garden cleaner, first, remove any visible debris using a brush or toothpick. If the blockage persists, soak the nozzle in vinegar to dissolve mineral deposits. Finally, check the hose for kinks or bends that may be obstructing the flow of water.
What are some common causes of motor failure in Kärcher garden cleaners?
Common causes of motor failure in Kärcher garden cleaners include overheating, electrical faults, and mechanical wear. To prevent motor failure, avoid overworking the motor, check electrical connections regularly, and follow recommended maintenance procedures.
How can I ensure the longevity of my Kärcher garden cleaner?
To ensure the longevity of your Kärcher garden cleaner, perform regular maintenance such as cleaning the exterior, inspecting components for wear, and lubricating moving parts. Store the cleaner properly when not in use, and address any issues promptly to prevent further damage.

For 15 years, Hellen James has worked in the gardening industry as an expert and landscape designer. During her career, she has worked for a variety of businesses that specialize in landscaping and gardening from small firms to large corporations.