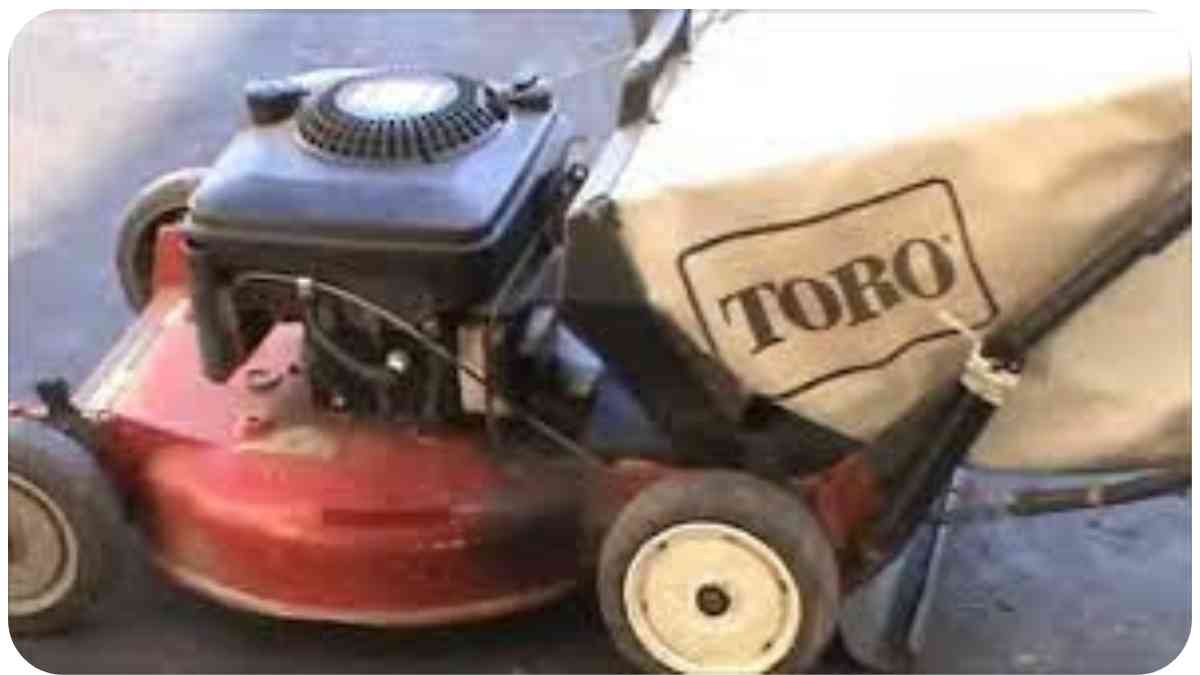
When you rely on your trusty Toro lawn mower to keep your yard in impeccable shape, encountering a charging issue can be a real setback. But fear not, as this guide is designed to walk you through troubleshooting steps that will help you get your mower back in action.
As someone who has spent years maintaining lawnmowers, I’m excited to share my expertise, personal anecdotes, and practical solutions to resolve charging problems.
| Key Takeaways from the Article |
|---|
| 1. Diagnose and Troubleshoot: Understand the charging system and diagnose issues step by step. |
| 2. Battery Care: Ensure secure connections, clean terminals, and maintain battery health. |
| 3. Cable Check: Inspect and replace damaged charging cables to maintain proper electrical flow. |
| 4. Voltage Regulation: Test and regulate voltage output using a multimeter for consistent charging. |
| 5. Alternator Examination: Inspect belts, diodes, and brushes to ensure proper alternator function. |
| 6. Battery Assessment: Evaluate battery condition, top up electrolyte, and address sulfation. |
| 7. Maintenance Tips: Keep the mower clean, charge the battery periodically, and include charging system checks in your routine. |
| 8. Professional Help: Seek expert assistance for complex issues that may require specialized attention. |
| 9. Resourceful Reading: Explore further reading and FAQs for more insights and solutions. |
| 10. Prioritize Longevity: Maintain your mower’s charging system to extend its lifespan and ensure consistent performance. |
Understanding the Charging System
Before we delve into the solutions, let’s briefly understand how the charging system in a Toro lawn mower works. The charging system consists of key components like the battery, charging cable, voltage regulator, and alternator.
The battery stores electrical energy, the alternator generates power, and the voltage regulator ensures the right amount of charge flows to the battery. If any of these components face issues, your mower might not charge properly.
Looking to enhance your outdoor space? Learn how to install a sink in your backyard the easy way, adding both functionality and convenience to your outdoor activities.
Common Signs of Charging Issues
Experiencing a charging problem? Look out for signs like a sluggish starter, dimming lights, or a battery warning indicator. These could indicate an underlying issue within the charging system. Now, let’s roll up our sleeves and troubleshoot the problem step by step.
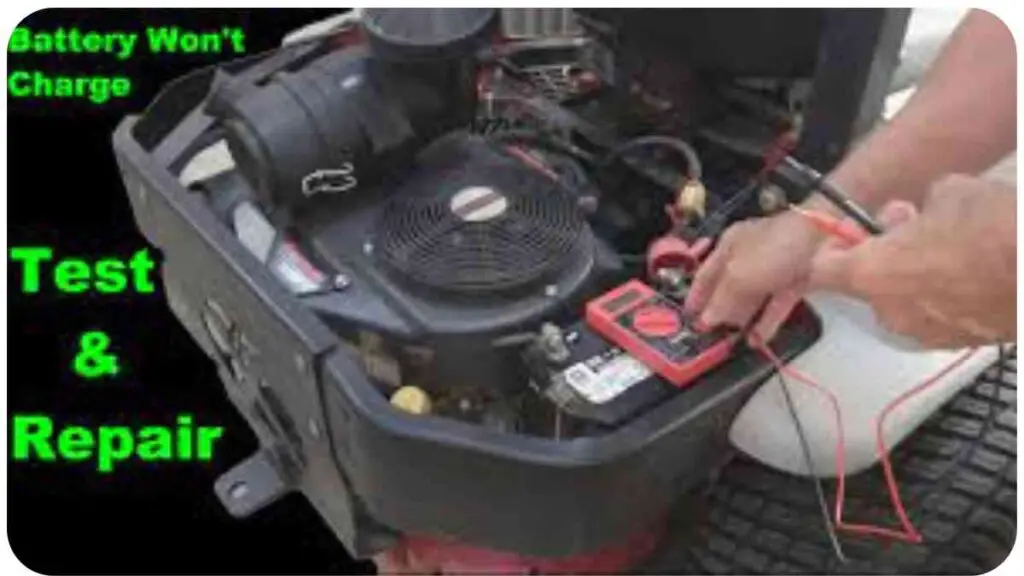
Step 1: Check the Battery Connection
Start by ensuring that the battery connections are secure and free from corrosion. A loose or corroded connection can hinder the flow of charge. Refer to Table 1 for a breakdown of battery connection troubleshooting.
Battery Connection Troubleshooting
| Issue | Solution |
| Loose connection | Tighten the battery terminals using a wrench. |
| Corrosion on terminals | Clean the terminals with a mixture of baking soda and water. Rinse and dry thoroughly. |
Step 2: Inspect the Charging Cable
A damaged or frayed charging cable can impede the flow of electricity from the alternator to the battery. Let’s take a closer look at the potential problems and solutions in Table 2 below.
Maximize your small backyard with simple tips! Discover ways to make your backyard more small, optimizing space for relaxation, entertainment, and gardening in a compact area.
Charging Cable Troubleshooting
| Issue | Solution |
| Frayed or damaged cable | Replace the charging cable with a new one. |
| Loose connection | Ensure the cable is securely attached to both the alternator and the battery terminals. |
Step 3: Test the Voltage Regulator
The voltage regulator plays a crucial role in maintaining a consistent flow of charge. If it’s malfunctioning, your mower’s battery might not charge properly. Here’s how to troubleshoot it, as outlined in Table 3.
Voltage Regulator Troubleshooting
| Issue | Solution |
| Inconsistent voltage output | Use a multimeter to test the voltage output of the regulator. Replace if readings are off. |
| Overcharging or undercharging | Test the regulator’s regulation. Replace if the battery is being overcharged or undercharged. |
Step 4: Examine the Alternator
The alternator is responsible for generating electricity that charges the battery. A faulty alternator can lead to charging issues. Let’s examine the potential problems and solutions in Table 4 below.
Alternator Troubleshooting
| Issue | Solution |
| No output | Check the alternator belt for tension and wear. Replace if necessary. |
| Malfunctioning diodes | Test the alternator diodes with a multimeter. Replace if diodes are faulty. |
| Worn-out brushes | Inspect the brushes for wear. If they’re worn, replace them to restore charging. |
Step 5: Assess the Battery Condition
Even with a functioning charging system, a worn-out battery won’t hold a charge. Evaluate the battery’s condition using the guidelines in Table 5.
Revive your backyard deck with ease! Our guide on restoring your backyard deck provides practical advice, ensuring your outdoor space remains inviting and comfortable year-round.
Battery Condition Assessment
| Issue | Solution |
| Low electrolyte level | Top up the battery with distilled water as needed, following the manufacturer’s recommendations. |
| Sulfation | If the battery is sulfated (crusty build-up on terminals), clean it using a battery terminal cleaner. |
| Old battery | If the battery is old and unable to hold a charge, replace it with a new one. |
Troubleshooting Solutions Overview

Let’s summarize the troubleshooting steps in a convenient table for quick reference.
Troubleshooting Solutions Overview
| Step | Issue | Solution |
| 1 | Battery Connection | Check and tighten terminals, clean corrosion. |
| 2 | Charging Cable | Replace damaged cable, ensure secure connections. |
| 3 | Voltage Regulator | Test output consistency, regulate over/undercharging. |
| 4 | Alternator | Check belt, test diodes, replace brushes. |
| 5 | Battery Condition | Top up electrolyte, clean sulfation, replace old battery. |
Additional Tips for Maintenance
Maintaining your Toro lawn mower’s charging system can prevent future issues. Here are some additional tips that I’ve learned from my years of experience:
- Regular Cleaning: Keep the mower clean and free from debris, especially around the battery and alternator. This prevents dust and dirt from interfering with connections.
- Charge the Battery: If your mower has been idle for a while, it’s a good practice to charge the battery periodically. This helps prevent battery drain and ensures it’s ready for action.
- Inspection Routine: Include a charging system check as part of your regular mower inspection routine. This helps catch issues early and keeps your mower running smoothly.
When to Seek Professional Help
While these troubleshooting steps are designed to resolve common charging issues, there might be more complex problems that require professional intervention. If you’ve tried these steps and your mower still isn’t charging, it’s a sign to consult a qualified technician who can diagnose and address the issue effectively.
Maintaining healthy plants starts with quality potting soil. Learn how often you should replace potting soil to ensure optimal plant growth and prevent issues caused by depleted nutrients.
Conclusion
In this guide, we’ve explored step-by-step solutions to tackle charging issues with your Toro lawn mower. By understanding the components of the charging system and following the troubleshooting steps outlined in the tables, you’ll be well-equipped to diagnose and resolve common problems.
Remember, maintenance is key to preventing future issues, and seeking professional help when needed ensures the longevity of your mower. With the knowledge gained here, you’re ready to take charge of your mower’s charging system and keep your yard looking pristine. Happy mowing!
Further Reading
Want to dive deeper into Toro lawn mower charging issues? Here are some additional resources that can provide you with more insights and solutions:
Toro Lawn Mower Operator’s Manual – This official Toro manual offers detailed information about your mower’s components, including the charging system. A valuable resource for understanding your mower better.
How to Fix a Toro Lawnmower: Diagnose the Most Common Problems with Fixes – This comprehensive guide breaks down various Toro lawnmower issues and provides practical solutions for troubleshooting and repairs.
Toro Cordless Electric Lawn Mower Not Charging? Expert Advice – Get insights from experts in this Q&A format article. Discover expert advice and solutions to common Toro electric mower charging issues.
FAQs
Have some burning questions about Toro lawnmower charging problems? Here are answers to some of the most commonly asked questions:
How often should I inspect my Toro mower’s charging system?
Regularly inspect your Toro mower’s charging system as part of your maintenance routine. Aim to check it at least once a month to catch any potential issues early.
My mower’s battery is new, but it’s still not charging. What could be the problem?
While a new battery should work fine, there might be an issue with the alternator or voltage regulator. Revisit the troubleshooting steps to identify and address the root cause.
Can I use a universal charging cable for my Toro electric mower?
It’s recommended to use a charging cable specifically designed for your Toro model to ensure compatibility and optimal performance. Universal cables might not provide the correct voltage and current.
What’s the typical lifespan of a Toro lawnmower battery?
The lifespan of a Toro lawnmower battery can vary depending on usage and maintenance. On average, a well-maintained battery can last around 3-4 years.
Why should I seek professional help for charging issues?
If you’ve tried the troubleshooting steps and your mower still isn’t charging, it’s wise to consult a professional technician. Complex issues might require specialized tools and expertise for accurate diagnosis and repair.

For 15 years, Hellen James has worked in the gardening industry as an expert and landscape designer. During her career, she has worked for a variety of businesses that specialize in landscaping and gardening from small firms to large corporations.