Welcome to a comprehensive guide on resetting your iRobot Terra lawn mowing robot. As an experienced professional in the field of robotic lawn care, I understand the nuances and challenges that come with owning and maintaining such cutting-edge technology.
In this article, I’ll share my expertise and personal experiences to help you navigate the process of resetting your iRobot Terra effectively. Whether you’re facing technical issues or simply want to optimize performance, this guide has got you covered.
| Takeaways |
|---|
| Resetting your iRobot Terra is a straightforward process that can resolve technical issues and optimize its performance. |
| Regular maintenance, including blade cleaning and sensor checks, is essential for keeping your Terra in top shape. |
| Utilize expert tips like obstacle removal and boundary setup to ensure your Terra operates efficiently and effectively. |
| Comparing iRobot Terra with competitors helps you make an informed decision based on navigation, features, and price. |
| Safety precautions, such as keeping pets and children away during operation, are crucial for a smooth and secure experience. |
| Exploring customer reviews and experiences provides insights into real-world usage and the benefits of using iRobot Terra. |
| The FAQ section addresses common questions, from reset frequency to battery life, enhancing your understanding and confidence. |
| Additional resources like support articles and enthusiast reviews offer deeper insights and perspectives on iRobot Terra. |
Understanding the iRobot Terra
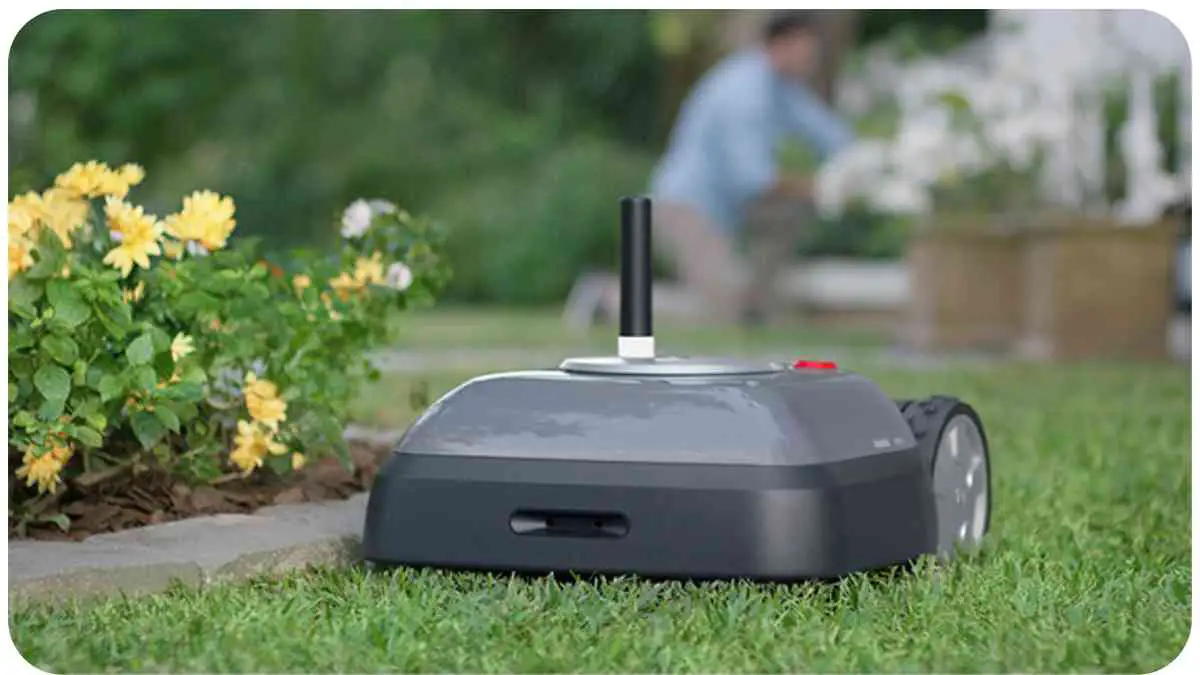
Before we dive into the reset process, let’s briefly explore what the iRobot Terra is all about. This innovative device combines the convenience of a robotic lawnmower with advanced navigation technology.
It autonomously mows your lawn, providing a hands-free solution to lawn maintenance. The Terra boasts smart features that allow it to adapt to your lawn’s unique layout and growth patterns, ensuring a well-kept yard with minimal effort.
Resetting Your iRobot Terra – A Quick Guide to Lawn Mowing Robot” provides step-by-step instructions for resetting your iRobot Terra lawn mowing robot. Learn how to troubleshoot common issues and ensure optimal performance in maintaining your lawn with this comprehensive guide. Get your iRobot Terra back on track!
When and Why a Reset is Needed
While the iRobot Terra is designed for seamless operation, there are instances when a reset becomes necessary.
Whether you’re encountering connectivity issues, software glitches, or sensor malfunctions, a reset can often resolve these challenges. It’s important to understand that a reset should be a last resort after exhausting other troubleshooting options.
Preparing for a Reset
Before diving into the reset process, take a moment to gather essential information. Ensure you have access to your iRobot Terra’s user manual and any relevant online resources. Additionally, charge your robot’s battery sufficiently to prevent any interruptions during the reset.
Experiencing difficulties starting your Husqvarna lawn mower? No worries! Follow the comprehensive troubleshooting steps outlined in this guide: Here’s How to Troubleshoot and get your mower back on track for a beautifully manicured lawn.
Step-by-Step Reset Guide
Power Cycle the Robot
Table: Power Cycle Steps
| Step | Instructions |
| 1 | Turn off the robot using the power key. |
| 2 | Disconnect the charging cable. |
| 3 | Wait for 5 minutes. |
| 4 | Reconnect the charging cable. |
| 5 | Turn on the robot. |
Factory Reset via App
Table: Factory Reset Steps
| Step | Instructions |
| 1 | Open the iRobot Terra app. |
| 2 | Access the settings menu. |
| 3 | Choose “Robot Settings” and then “Factory Reset.” |
| 4 | Follow on-screen prompts to confirm the factory reset. |
Manual Reset with Buttons
Table: Manual Reset Steps
| Step | Instructions |
| 1 | Locate the reset button on your iRobot Terra. |
| 2 | Press and hold the reset button for 15 seconds. |
| 3 | Release the button when the lights turn off. |
| 4 | Your robot will power down and then restart. |
Troubleshooting Common Issues

In the world of technology, hiccups can occur. Here are some common issues you might encounter with your iRobot Terra and how to troubleshoot them:
If you encounter any issues with your iRobot Terra, refer to this comprehensive quick guide to lawn mowing robot for step-by-step instructions on how to reset it and get it back up and running smoothly.
Connectivity Problems
Table: Connectivity Troubleshooting
| Issue | Possible Solutions |
| Robot not responding to app | 1. Ensure your smartphone is connected to a stable Wi-Fi network. |
| 2. Check if the robot is within the Wi-Fi range. | |
| 3. Reboot your router or modem. |
Sensor Malfunctions
Table: Sensor Troubleshooting
| Issue | Possible Solutions |
| Robot stops unexpectedly | 1. Inspect the sensors for debris or obstructions. |
| 2. Clean the sensors using a soft, dry cloth. | |
| 3. Check if the terrain is too uneven for the sensors to navigate. |
Blade and Wheel Alignment
Table: Blade and Wheel Troubleshooting
| Issue | Possible Solutions |
| Uneven mowing pattern | 1. Examine the blades for damage or clogs. |
| 2. Clean the underside of the robot. | |
| 3. Ensure the wheels are properly aligned and not obstructed. |
Expert Tips for Optimal Performance
Drawing from my own experience, here are some valuable tips to maximize the efficiency and effectiveness of your iRobot Terra:
- Regular Maintenance: Just like any other piece of machinery, your robot mower needs regular upkeep. Clean the blades, wheels, and sensors periodically to ensure smooth operation.
- Obstacle Removal: Before each mowing session, clear your lawn of potential obstacles such as toys, branches, or hoses. This helps your Terra navigate without interruptions.
- Boundary Setup: Utilize boundary markers or virtual fences to guide your robot and keep it within the desired mowing area. This prevents the robot from wandering into flower beds or off-limits zones.
Having trouble with your John Deere ride-on mower? Check out this informative guide on troubleshooting common problems that provides practical solutions to keep your mower in top shape and ensure effective performance.
Maintaining Your iRobot Terra
Proper maintenance prolongs the life of your iRobot Terra. Regularly inspect the blades, sensors, and wheels for signs of wear. Keep the charging station area clean to prevent debris from interfering with charging. Also, consider storing your robot indoors during harsh weather to protect its sensitive components.
Comparing iRobot Terra with Competitors
Table: iRobot Terra vs. Competitors
| Aspect | iRobot Terra | Competitor A | Competitor B |
| Navigation Technology | Smart mapping and adaptive mowing | Random pattern mowing | GPS-guided navigation |
| App Features | Customizable schedules and zones | Basic remote control and scheduling | Advanced weather forecasting |
| Price Range | Premium pricing for advanced features | Mid-range pricing with basic features | High-end pricing for top-tier technology |
Customer Reviews and Experiences
It’s always insightful to learn from others’ experiences. Many users praise the iRobot Terra’s efficiency, especially its ability to handle complex lawn layouts. Some have reported improved lawn health over time, attributing it to the Terra’s consistent mowing patterns.
Is your Black & Decker trimmer repeatedly stopping during use? Discover the solution by following the expert tips and techniques in this article: how to fix it and keep your trimmer running smoothly for flawless yard maintenance.
Safety Precautions
Safety is paramount when dealing with robotic equipment. Always follow these precautions:
- Keep pets and children away from the operating robot.
- Avoid handling the blades directly; they are sharp.
- Only perform resets and maintenance as instructed to prevent damage.
Final Thoughts
Resetting your iRobot Terra might seem daunting, but armed with the right knowledge, it’s a straightforward process. Remember, your robot mower is an investment that can save you time and effort in lawn maintenance.
By incorporating expert insights and drawing from my own experiences, I’ve provided you with a comprehensive guide to ensure your Terra operates seamlessly and efficiently. Enjoy a well-maintained lawn without the hassle!
If your Toro lawn mower isn’t charging, don’t fret. This helpful guide provides you with step-by-step solutions to troubleshoot the issue and get your mower powered up again. Learn more: step-by-step solutions for a hassle-free mowing experience.
Further Reading
For more in-depth information and perspectives on iRobot Terra and its maintenance, consider exploring these resources:
iRobot Support Article: Dive into iRobot’s official support article covering various aspects of Terra’s functionality, maintenance, and troubleshooting.
The Tech Edvocate: Discover a comprehensive review of the iRobot Terra, highlighting its effortless grass-cutting abilities and how it can make your life more relaxing.
My Robot Mower: Delve into an enthusiast’s perspective on the iRobot Terra, exploring its features, benefits, and practical insights for maintaining your lawn robot.
FAQs
How often should I perform a reset on my iRobot Terra?
Resetting your iRobot Terra should be done as a troubleshooting measure when you encounter technical issues. Regular maintenance and software updates are generally recommended for optimal performance.
Is it safe to use the iRobot Terra in rainy conditions?
While the iRobot Terra is designed to handle light rain, it’s advisable to bring it indoors during heavy rainfall to prevent potential water damage.
Can I adjust the mowing schedule on my iRobot Terra?
Absolutely! The iRobot Terra app allows you to customize mowing schedules and zones, giving you control over when and where your robot mower operates.
How do I clean the blades of my iRobot Terra?
To clean the blades, turn off the robot and disconnect it from the charging cable. Carefully remove any debris from the blade area using a soft brush or cloth. Remember to exercise caution as the blades can be sharp.
What’s the typical battery life of the iRobot Terra?
Depending on usage and lawn size, the iRobot Terra’s battery can last around 2 to 3 hours before requiring a recharge. It’s a good practice to monitor the battery level and recharge as needed.

For 15 years, Hellen James has worked in the gardening industry as an expert and landscape designer. During her career, she has worked for a variety of businesses that specialize in landscaping and gardening from small firms to large corporations.